Mini Powerful BTL Power Amplifier 2SC5200 2SA1943
Hello guys, in this post I will assemble an OCL power amp, PCB from JLCPCB, and PCB along with soldered SMD components. The PCB is glowing, and the soldering of the SMD components is also neat. The components are installed according to what we chose through the SMT Service JLCPCB, just right, no more or less. The most minor component I use is R size 0402 soldering a component this small would be difficult. I panelized this PCB 2x2, one pcb can be 4 mono amplifiers. Later I will BTL, 2 amplifiers into one mono. This PCB was designed Wahyu Eko Romadhon Youtube
 |
| SMT Assembly from JLCPCB |
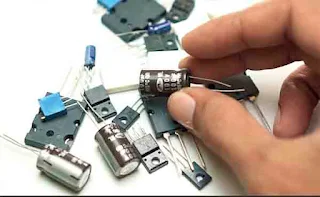
Okay, then, prepare the through hole components. A final transistor using Toshiba C5200 and A1943 per mono a set of final transistors, Elco using 100uF 100V, tr vas using MJE340, Tr driver using C4792 pair A1837, trimpot bias and DCO using multiturn trimpot, so it's easier to adjust DCO and bias, the value can be PCB labeled.
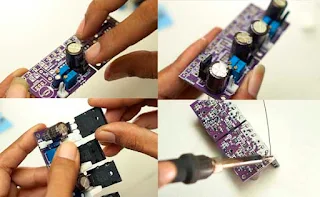
OK, I'll assemble it first.
Heatsink measuring 6.5cm long, 3cm wide and 5mm thick
The kit is complete with a heatsink, this size of the heatsink is still not real, if you play at 90V DC CT it is very prone to breaking even though you play at 8 ohms, later I will supply only 65VDC CT, it's still safe at 8 ohms if the 4-ohm test load continues it's also vulnerable, but for music, it can still play at 4-ohm impedance.
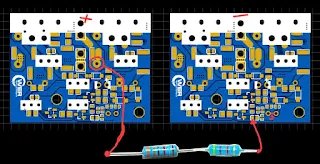
This BTL amplifier method without adding a BTL preamp is sufficient with an additional resistor, first mark the amplifier out - and + to make it easier, on the speaker input - jump to gnd or can be directly soldered like this.
Then add a 33K resistor in the 4K7 series, why not just 39K?
because the one that fits and is closest to the output can balance the value of 33K series 4K7. if the value is too small or too high then the output can be high side like this.
so if measured using an ac voltmeter and injected sine, the output voltage as much as possible is the same as the output voltage between speakers + and min to gnd.
The installation of this resistor whose + part is soldered to the speaker outline, and the min speaker part can be to the base of this tr or in the capacitance of this part.
when it's finished, the output will be balanced, and the clips can be together like this.
So the measured voltage can be the same as the output voltage of 24.4V AC between output to ground. out + to ground in blue and out - to gnd in yellow.
For the full test, you can check the video below. (Indonesian)
The amplifier can be supplied 30-75VDC CT output power at 8 ohms can be 500W RMS continuous sine. Enough power for 15-inch speakers, as long as the power supply is sufficient. Minimum SMPS power/Power supply 1000W.
For Gerber, Pick and Place, and BoM files, you can download the link below :
Download PCB panelized Row 2 Column 2 OCL Mini super
How to print PCB at JLCPCB can follow this step.
First, visit the JLCPCB site. then log in or register first (if you don't have an account) the button is in the top right corner click "Order Now"
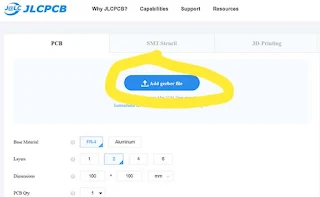
Then click "Add Gerber file"
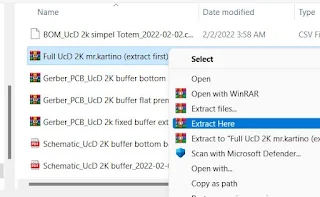
Select the Gerber file that has been downloaded at the end of the post link, but before using the downloaded file, the file with the name "Full UcD 2K mr.kartino (extract first)" must be extracted first.
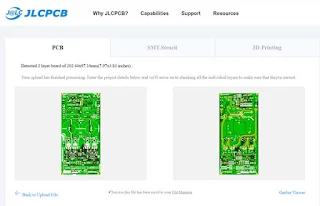
Then select Gerber one by one, then double click. Wait for the upload process to complete. then if you want to add another Gerber file, just click "Add Gerber file" again. if the three PCBs have been uploaded and you have selected the option for each PCB, click the basket, go to payment by clicking (Secure Checkout), and complete the payment on the next page. Payment can use a credit card, or debit visa, and also PayPal.
.jpg)



When it comes to inverters and inverter chargers, Renogy offers the most advanced solutions in the industry. Our products offer top-of-the-line features like power-saving mode and automatic power transfer.
ReplyDeletehttps://uk.renogy.com/3000w-12v-to-230v-240v-pure-sine-wave-inverter-with-english-standard-socket-with-ups-function/