Class-D Amplifier D1k5 Pro Double Feedback
This time I will build a Class-D D1k5 pro dual feedback power amplifier, and full features are available, OCP features, Input Limiter, DCP, Speaker Delay, Led Indicator Panel, Input balance, and DCO settings. jumper J3 and the limiter can also be bypassed at jumper J2 limiter if J2 is connected then the limiter will be active and vice versa. This schematic was originally designed by Mr. Kartino S, I redrew it in EasyEDA because I am used to using this application, and here is the PCB Layout that I designed.
 |
| Download at end of this post |
 |
| Download the highest image quality at the end of the post |
At the top layer, there is a component label that must be filled with components as listed. at the bottom layer, there is a label that matches the scheme so it's easier to determine the component if a problem occurs, or makes revisions, or upgrade components, so it'll be easier to mention the label at the bottom of the PCB. the design of capacitors and resistors of different sizes, this can be more flexible because I add holes to adjust the components. I will print this PCB at JLCPCB.com, for how to print on JLCPCB.
Install the components according to the label on the PCB. First I put a resistor and diode of the same size to make it easier to assemble. Next, let's install a larger component, for the IC I put a socket so it's easier to remove it. I attach the led directly to the PCB, if you want to add a led in the panel box, the LED on the PCB must be removed. For the r shunt, you can install 2x 10K in parallel, or you can use a 6k8 resistor if I prefer parallel like this, but it's a waste of time. more resistors. For the core, being able to use a single core is enough, with the MS157060-2 series. cores with a diameter of 4 cm. wrapped with 2mm diameter wire. Friends can also use 1 piece of 1.2mm-2mm, wrapped as much as 19x
winding, get 33uh inductance value. Continue to install the IC, install the dual opamp IC, TL072. then TL071, CD4049, and IR2110 mosfet driver IC. install a 5x20mm fuse can use a 10-15A fuse.
The mosfet that I use is IRFP260, if you want to upgrade to 120VDC, you can use an IRFP4242 mosfet, and some other components must be replaced. later I will make a post to upgrade at 120VDC.
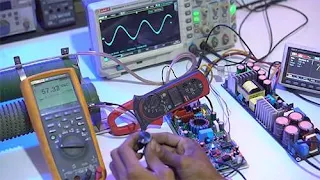
The following is a test load for the D1K5 Pro Double Feedback 8 ohm class-D amplifier with a supply voltage of 92VDC CT audio input is injected with a 100Hz sine signal, getting power continuously at 59.54VAC x 7.13A = 424.5W RMS
 |
| Test Load Class-D Amplifier D1K5 Pro Double Feedback at 4 OHM LOAD |
 |
| Test Load Class-D Amplifier D1K5 Pro Double Feedback at 4 OHM LOAD |
Watch the amplifier Class-D Amplifier D1k5 Pro Double Feedback assembly and test video at the following link: Class-D Amplifier D1k5 Pro Double Feedback
See also this powerful class-D amplifier: DIY Class-D Amplifier Fullbridge D2K 2500W RMS - Complete Build
Download:
Schematic Class-D Amplifier D1k5 Pro Double Feedback
PCB Layout High-Quality Images
Buy :Gerber Files by adding your logo in PCB Class-D Amplifier D1k5 Pro Double Feedback (Contact Us)
.jpg)
I live in the USA, how can I buy it?
ReplyDeleteYou can buy the PCB Layout Design order to JLCPCB
DeleteThis board works on 70vdc ??
ReplyDeletePlease tell me
Maybe works
DeleteIt works
DeleteAm asking for this file gerber
ReplyDelete