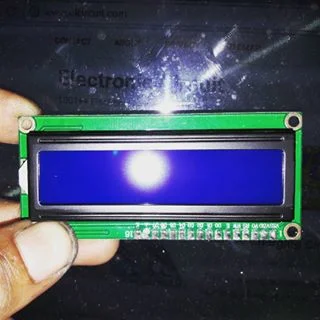
Running Text with LCD 16x2 using Arduino Uno
 |
| LCD 16x2 |
In experiment this time I will display the Running text (text Running) using 16x2 LCD which means LCD consists of 16 columns and 2 lines of code
Arduino Uno Board
- 1x Arduino Uno
- 1x Potentio meter 5K Ohm
- 16 Pin header (Connector) and then soldered to beforehand to the LCD)
- 1x Breadboard
- Jumper cables sufficiently
| Pin | Name | Description |
| 1 | VCC | +5V |
| 2 | GND | 0V |
| 3 | VEE | Contrast Voltage LCD |
| 4 | RS | Register Select |
| 5 | R/W | 1 = Read, 0 = Write |
| 6 | E | Enable Clock LCD |
| 7 | D0 | Data Bus 0 |
| 8 | D1 | Data Bus 1 |
| 9 | D2 | Data Bus 2 |
| 10 | D3 | Data Bus 3 |
| 11 | D4 | Data Bus 4 |
| 12 | D5 | Data Bus 5 |
| 13 | D6 | Data Bus 6 |
| 14 | D7 | Data Bus 7 |
| 15 | Anode | Positive Voltage backlight |
| 16 | Catode | Negative Voltage backlight |
LCD Pin Description:
LCD pin number 4 (RS) is a Register Selector function to select Register Control or Data Register. The control register is used to configure the LCD. Data registers are used to write data to the memory character LCD display.
LCD pin number 5 (R / W) is used to select the data stream if the READ or WRITE. Because most functions only to read data from the LCD and only need to write data only to the LCD, then the leg is connected to GND (WRITE).
LCD pin number 6 (ENABLE) is used to turn the LCD on the process of writing data to the Registry Control and Data Registers LCD.
Steps by steps to connect the LCD to Arduino:
1) Compose the circuit as shown below on a breadboard.
Installation Description:
Pin RS (4) connect with the pin 12 pin digital Arduino
Pin E (6 ) connect with the pin 11 pin digital Arduino
Pin D4 (11) connect with pin digital Arduino pin 5
Pin D5 (12) connect with pin digital Arduino pin 4
Pin D6 (13)connect with pin digital Arduino pin 3
D7 pin (14 feet) connect with pin digital Arduino pin 2
Connect the 10 Kohm pot to + 5v and GND and Pin LCD 3 to potentio
Pin 5 (R / W) to Ground
2.) After that connect the Arduino on a Laptop / PC using a serial cable.
3.) Download and Install program on Arduino.cc Arduino IDE (If Needed)
4.) Once installed, run the Arduino its program.
Click the menu "Tools - Board -Arduino Uno"
6.) Click the menu "Tools - Port -(Select Port arduino detected on your computer)
7.) Then enter Sketch below.
#include
*/
LiquidCrystal lcd(12, 11, 5, 4, 3, 2);
void setup() {
lcd.begin(16, 2);
}
void loop() {
int i;
lcd.setCursor(0, 0);
lcd.print("www.elcircuit.com");
for (i = 0 ; i < 16; i ++) {
lcd.scrollDisplayLeft();
delay(400);
}
}
*/
LiquidCrystal lcd(12, 11, 5, 4, 3, 2);
void setup() {
lcd.begin(16, 2);
}
void loop() {
int i;
lcd.setCursor(0, 0);
lcd.print("www.elcircuit.com");
for (i = 0 ; i < 16; i ++) {
lcd.scrollDisplayLeft();
delay(400);
}
}
8.)Upload the sketch to Arduino Board
.jpg)


Post a Comment for "Running Text with LCD 16x2 using Arduino Uno"
Dont use outgoing links!